

Congratulations to Kathie Barbera, you won a 6×6 pack of the Come Sail Away Designer series paper! Please email your mailing address to me at: tsstamping@gmail.com
Congratulations to Kathie Barbera, you won a 6×6 pack of the Come Sail Away Designer series paper! Please email your mailing address to me at: tsstamping@gmail.com

To create the box you need a piece of cardstock that measures 11″ by 8 1/4″. Score the long side at 2 1/2, 3 5/8, 7 3/8 and 8 1/2. Score the short side at 1 1/8, 2 1/4, 6, and 7 1/8. Cut away all four corner squares. The mat for the box is 3 3/8 by 1 and the DSP measures 3 1/2 by 7/8. You will need 4 of these to attach to the sides of the box. The top of the box has cardstock that measures 3 1/2 by 3 1/2 and the white cardstock measures at 3 3/8 by 3 3/8.
To make each card you will need a piece of cardstock that measures 7 by 3 1/2 and fold each one in half. The box will hold six cards and envelopes. The next layer measures at 3 3/8 by 3 3/8 and the whisper white measures at 3 1/4 by 3 1/4. The inside layer is 3 3/8 by 3 3/8.
To make the envelopes use an envelope punch board and whisper white paper that measures 6 by 6.
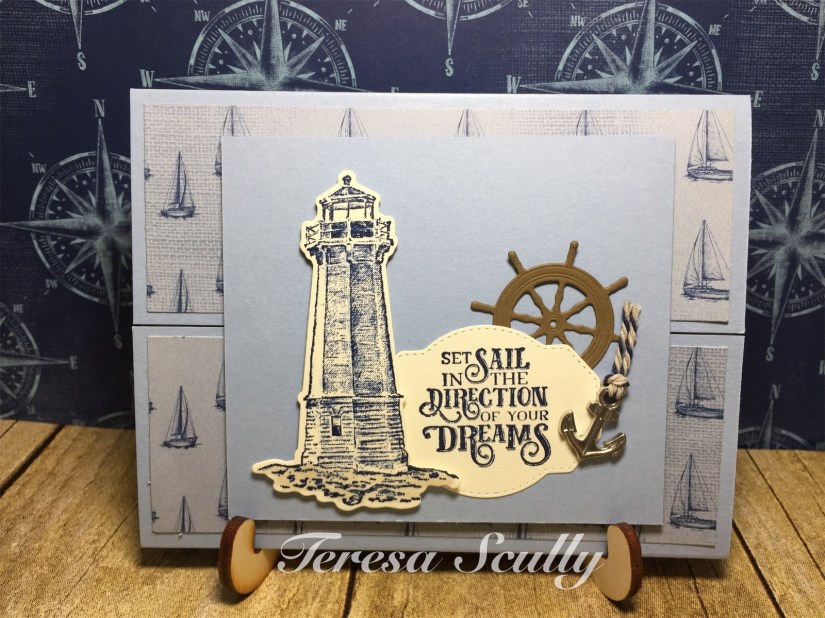
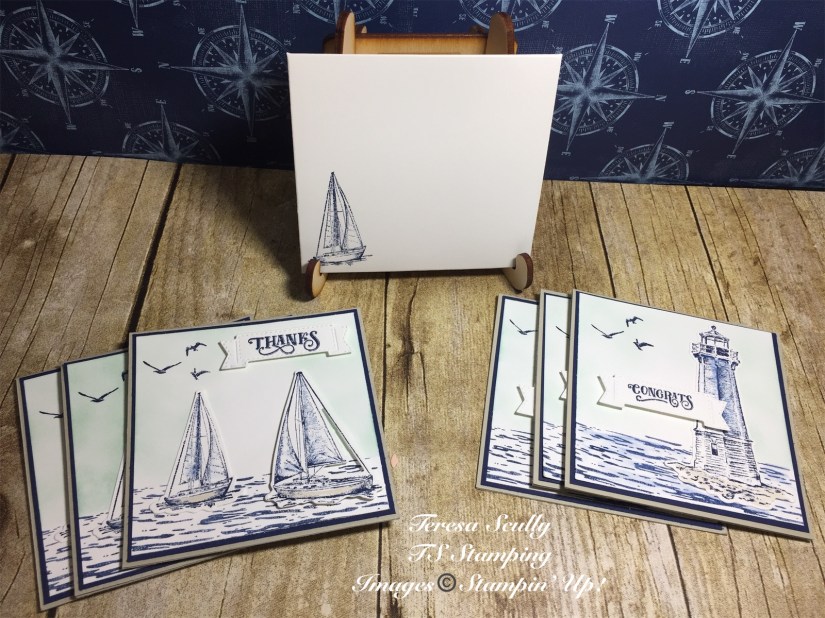
Card Choice A: Base is Seaside Spray
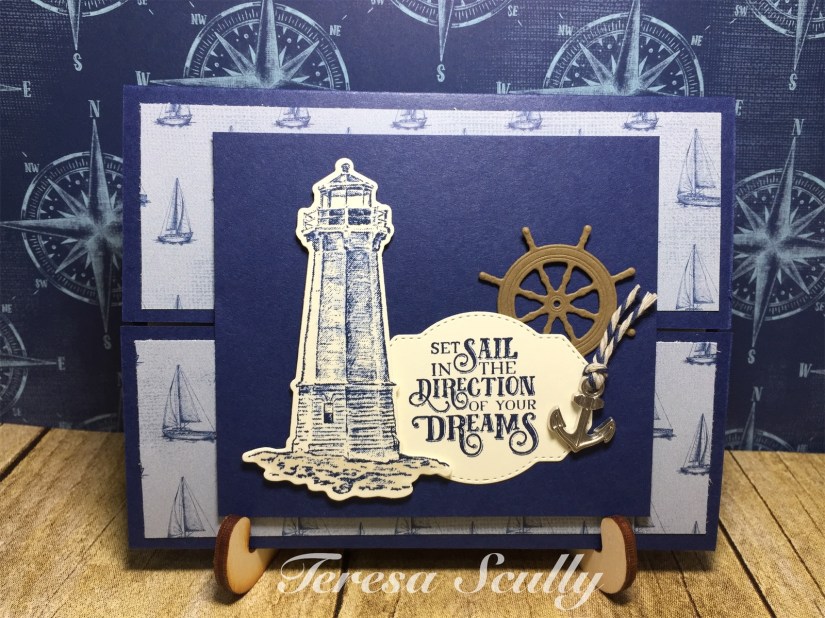
Card Choice B: Base is Night of Navy
Prize Patrol: Make a comment below as to which card is your favorite. Keep in mind there is no wrong answer. I will be giving away a 6×6 pack of the come sail away designer series paper. Winner will be announced here next Monday.
Double Z fold card featuring the Animal Outing suite.


The card base is Thick Whisper White cardstock that measures 4 1/4 by 11, and is scored at 5 1/2 and 8 1/4. The shaded spruce paper measures at 5 1/4 by 4 and 2 1/2 by 4, you will need 2. The Designer series paper for this panel measures at 5 by 3 3/4 and 3 3/4 by 2 1/4, you will need 2 for this size. Attach the shaded spruce and then the DSP paper.
The band is also in thick whisper white and measures 11 by 1 1/4, scored at 5 1/2 and 8 1/4. The Designer series paper for the band measures at 5 1/4 by 1 and 2 1/2 by 1 (2).
When you put the band on the card put the long piece over the two shorter pieces. Use adhesive only on the edge of the band.
I cut out the animals from the Designer series paper with the framelits, and fussy cut the animals with no dues. They are attached with dimensional.
The greeting is stamped in shaded spruce ink and cut out with the layering ovals, then attached to the card.
Product used are listed below:


This card is made with Berry Burst cardstock that measures 8 1/2 by 5 1/2, scored at 4 1/4. The designer series paper is 4 by 5 1/4, I cut 1 1/2 inches off the bottom and flipped the paper over. Then wrap ribbon around the card where the seam is and tied a bow. I stamped the rhino and colored him with the Smokey slate blends. I cut him out with the stitched framelits and layered it on a scallop circle in berry burst paper.
Products used:


Attached please find a retirement list of Stampin’ Up! products from the Annual catalog.
Click to access AC%2018-19%20Retiring%20List_US.pdf
And the Occasions catalog
Click to access OCC%2019%20Retiring%20List_US.pdf
The new catalog comes out on June 1st, if you placed an order with me I will automatically send you a catalog in the mail.
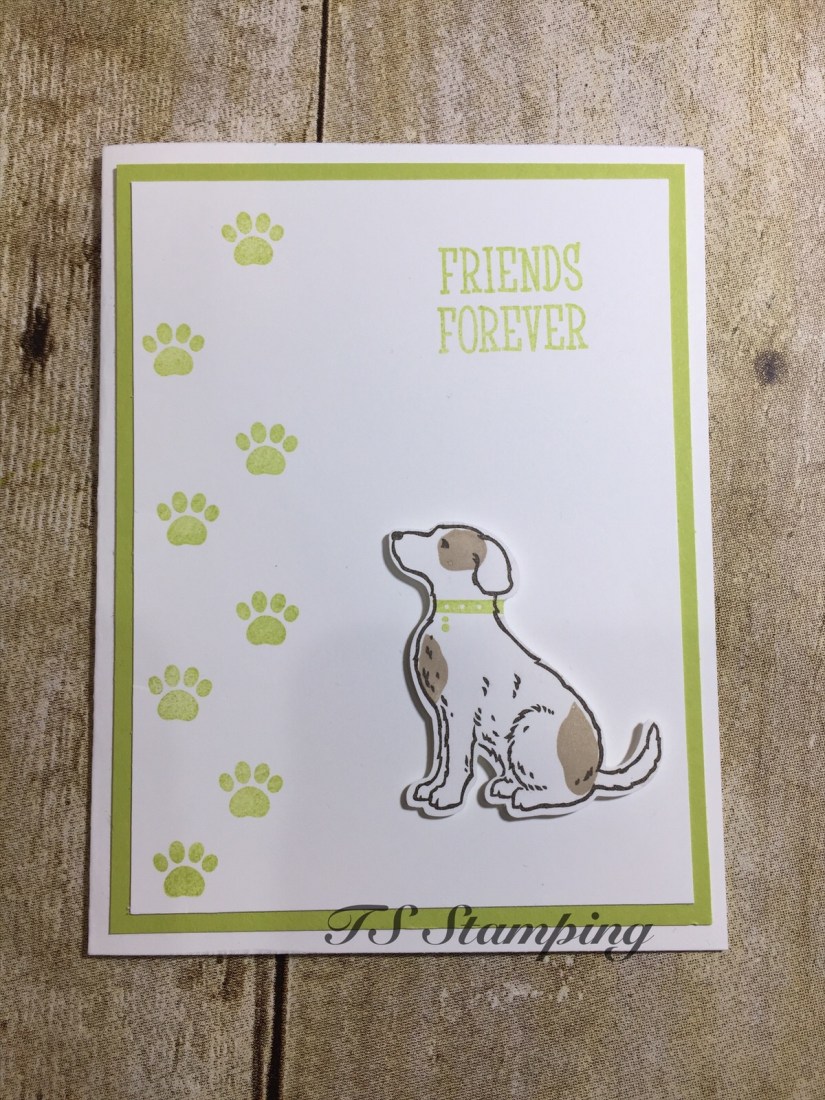
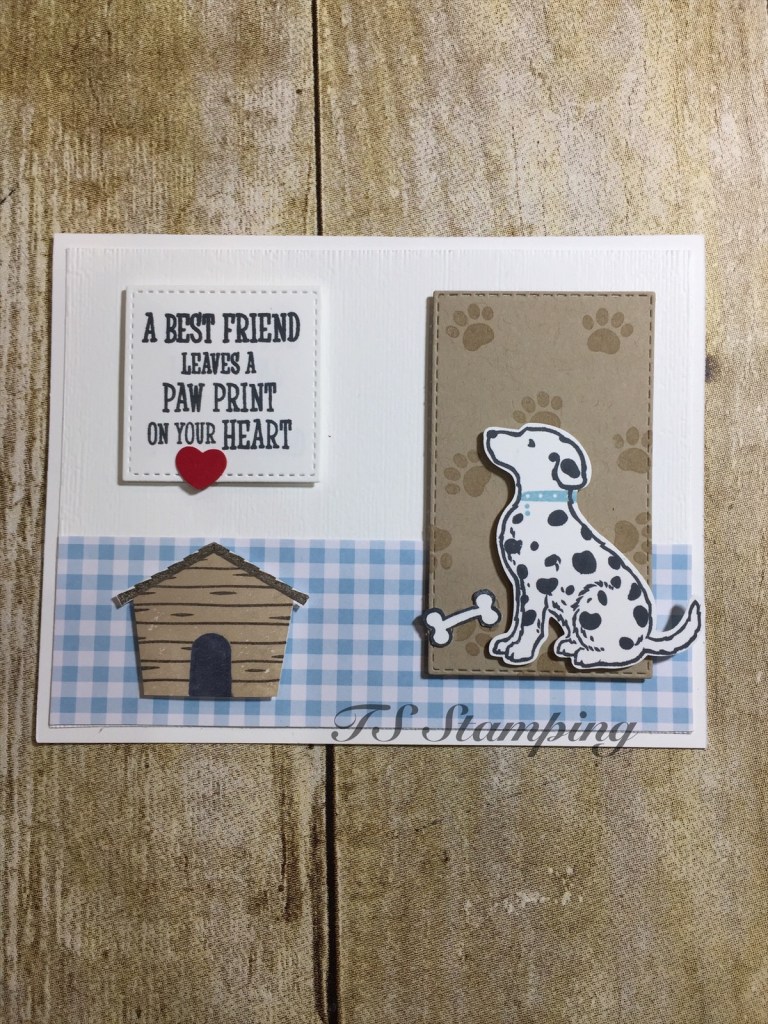
This card is made with an 8 1/2 by 5 1/2 piece of whisper white card stock. The lemon lime twist paper is 5 1/4 by 4 and the whisper white measures 5 by 3 3/4. I stamped the dog prints in lemon lime twist ink along with the greeting. The dog is stamped in Early Espresso ink, the spots I stamped with Crumb Cake. I punched out the dog with the punch included in the bundle.
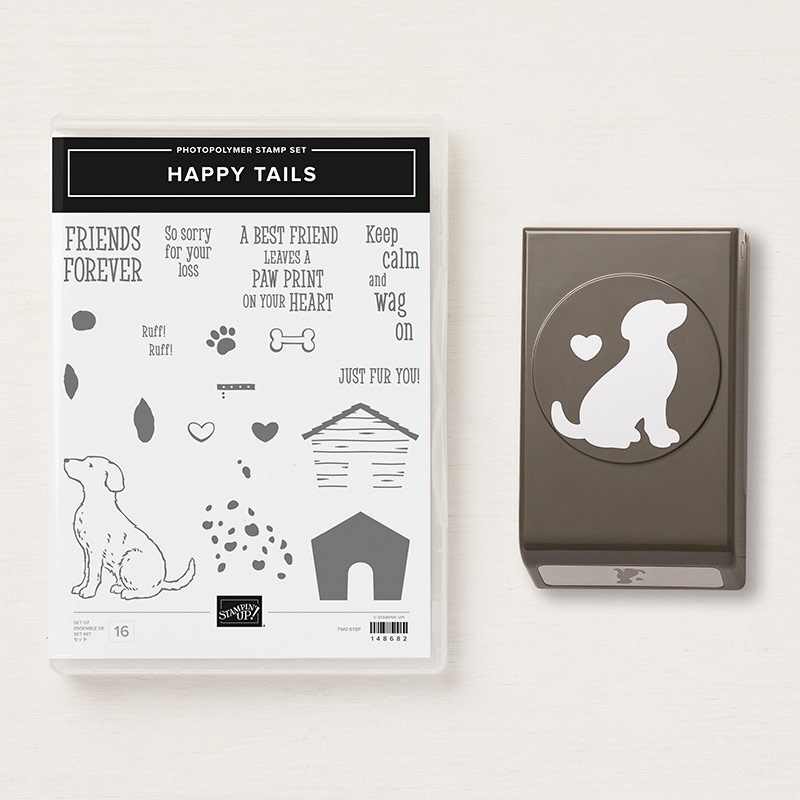
A second card I made with the same bundle used the same base, whisper white measuring at 8 1/2 by 5 1/2, folded in half at 4 1/4. I used another piece of whisper white, 5 1/4 by 4 and ran that through with the Subtles Dynamic Embossing folder ( item # 143706). I used a 1 by 5 1/2 piece of Gingham Gala paper (item # 148554). Next I stamped the dog, the house, and the greeting on a scrap piece of whisper white card stock. The crumb cake paper is cut out with the Rectangle Stiched Framelits, item number 148551. I stamped the paw prints with crumb cake ink. The greeting is cut out with the stitched shape framelit dies, item number 145372. I punch the dog with the dog punch and hand cut out the bone and dog house. Items are attached to the card with dimensional.
Please see my video on how to make these cards.
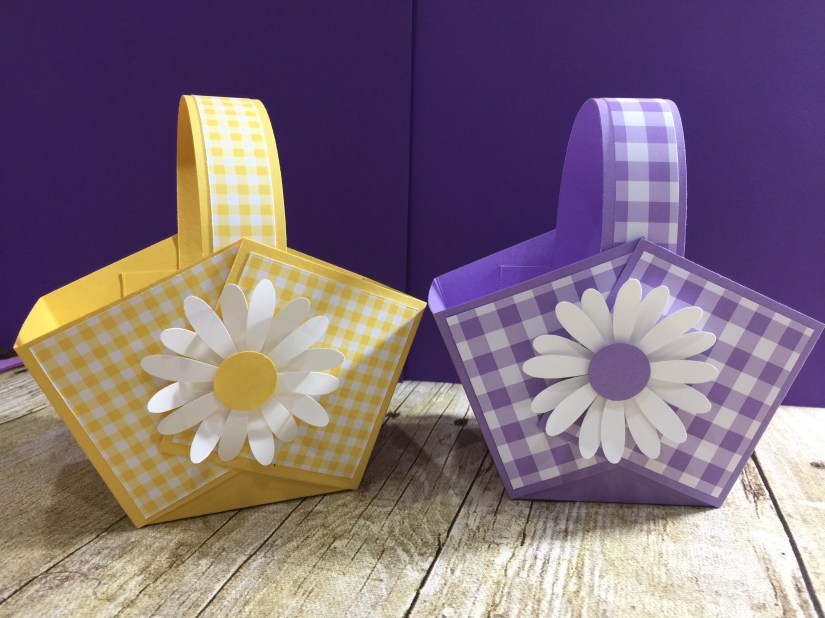
This larger basket is made from a simple piece of card stock. The card stock measures 8 1/4 by 8 1/4. Score both sides at 2 3/4 and 5 1/2. Your designer series paper needs to be 2 1/2 by 2 1/2 and you need 4 squares. For the handle cut a 1 inches strip of card stock and decorate with 3/4 piece of designer series paper. You can use any decorations on the side of the basket, I used the daisy punch to decorate the basket.
To make the basket you will need to cut on both sides to the 2 3/4 score line. Put a piece of tear and tape on the upper part of the center square and attach the DSP paper to the four outer squares. Bring the outer two square together and match the points. Remember to put a small piece of tear and tape under the decorative squares to hold them in place.
Attach the handle with tear and tape and decorate!
See my video below:


Here is an easy and cute card box that will fit 5 3 x 3 cards and envelopes. To make the box you will need a 6 1/2 by 7 1/2 piece of cardstock, On the 6 1/2 side score each side at 1 1/2 inches. Then on the 7 1/2 side score at 1 3/4, 3 1/4. and 5 but on the 5 inch score line only go to the 1 1/2 inch mark from the other side. Cut at the 5 inch mark and the 1 1/2 mark You will not nee this piece, do this on both sides. Attach a piece of 4 by 3 1/4 Designer series paper, you may round the corner on the top of the cardstock and the DSP paper. Also attach a piece of DSP paper to the bottom part of the box which should measure at 3 1/4 by 1 1/2. At the bottom you will cut the middle score lines to create a flap, put tear and tape on two of the inside flaps and fold up to make your box. Add an embellishment and a greeting to the front of the box. A video is posted on my Facebook page for better instructions. The link is listed below.
To make the cards the cardstock is 6 by 3 inches scored at 3 inches and folded in half. Add a piece of designer series paper which measures at 2 3/4 by 2 3/4, then just stamp a greeting and punch out with the 2 inch circle punch. I layered them on the starburst punch.
Items to make this project:


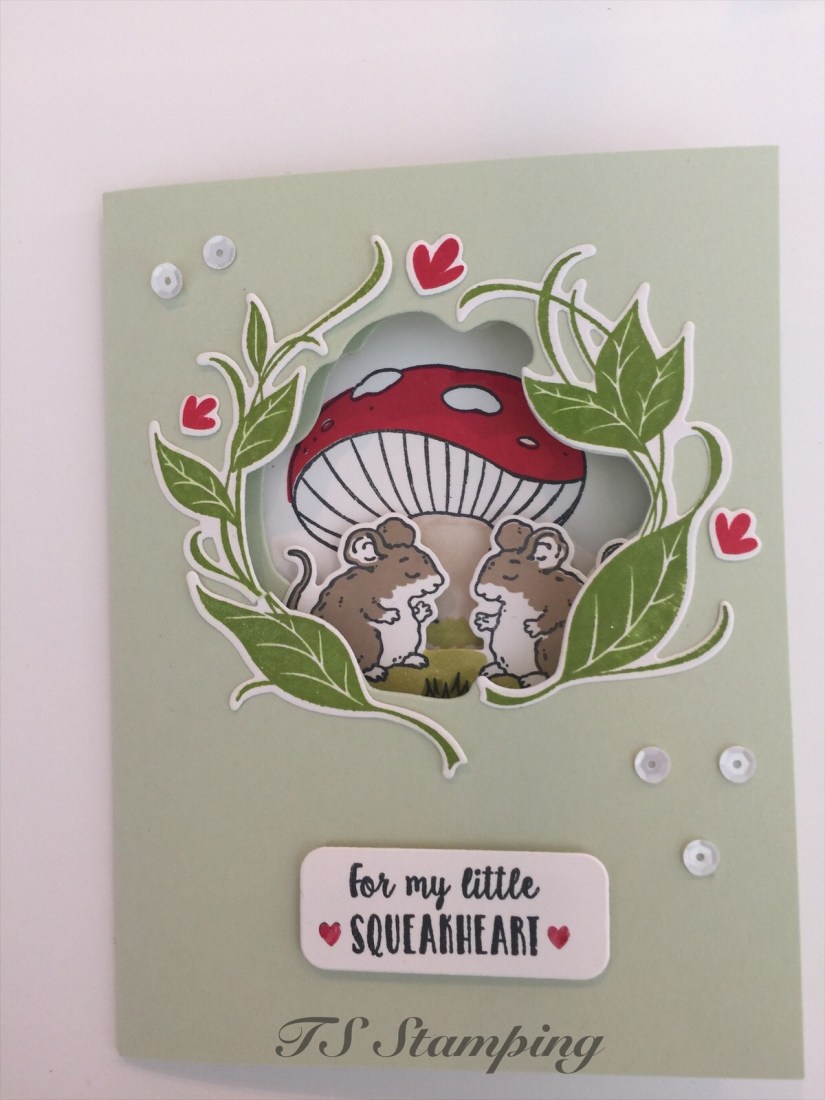
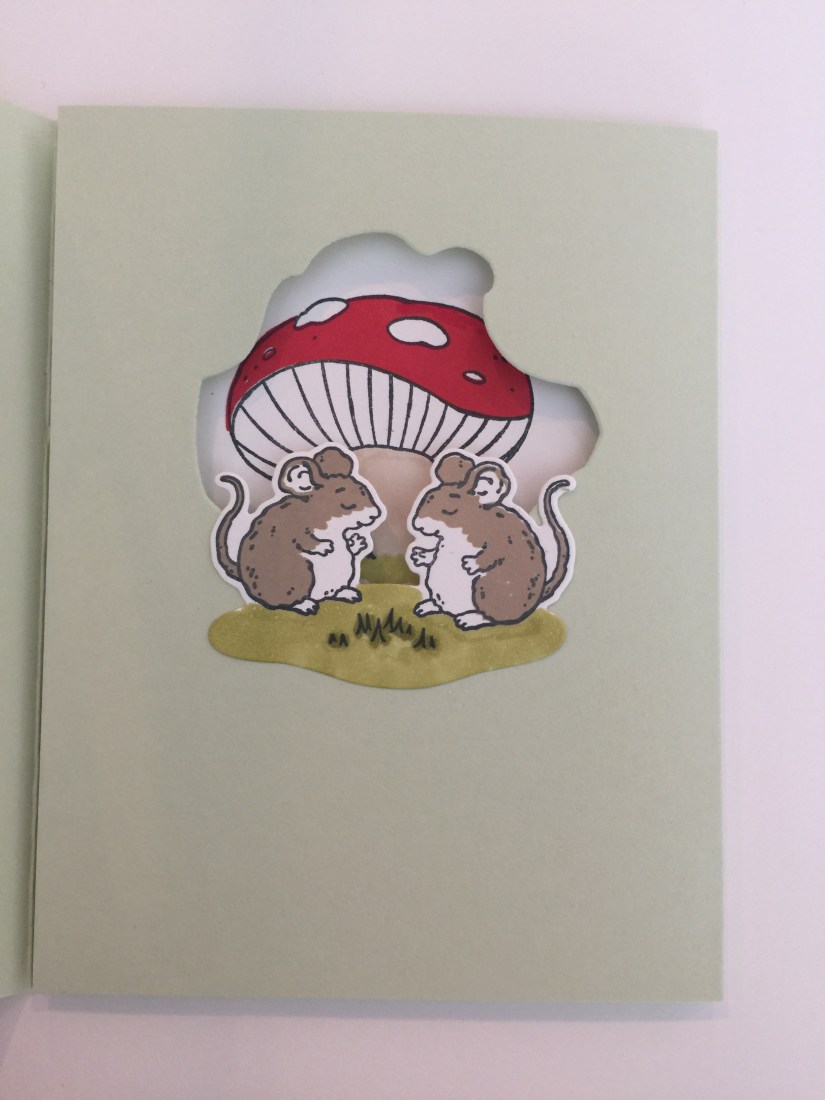

This is a cute card especially for a child on Valentine’s day. There is a special fold to make this card. You will need two sheets of 8 1/2 by 5 1/2 paper. Score both at 4 1/4, and attach the two pieces together so the fold opposite of each other. Cut out the opening on either side of the opening. Stamp the leaves and the mice then cut out with the dies. You will need a 4 by 5 1/4 whisper white card stock to stamp the inside mushroom and greeting.
Supply list is below:


